Hello, Sara here. Where I am in Vancouver, spring has begun and I have been looking to add a few “in-between seasons” garments to my wardrobe. I was so happy when True Bias released their Marlo Sweater pattern because it was just what I was looking for. It’s perfect for this season and I love the versatility of this sweater as it can be worn as a top or as an outer piece.
True Bias already has a quick yet in-depth tutorial on their Instagram and I encourage you to check it out before starting. This tutorial will cover making View A using a beginner-friendly method. My fabric didn’t allow itself to be folded so if you find yourself in a similar position, this tutorial is perfect for you.
My previous tutorial was very popular McCall’s M7969.
http://sewingtherapy.net/m7969-sew-along-tutorial/
So, I strongly recommend watching the video if you have things that you couldn’t understand.
These are my online fabric shops.
Dailylike Canada http://www.dailylike.ca
Two O Nine Fabric Studio https://twooninefabric.ca
Marlo Sweater Pattern from True Bias
https://shop.truebias.com/products
The fabrics I used in the video:
Rib Knit in Oatmeal Beige – http://bit.ly/30ugtST
Plaid Cotton Flannel Shirting – Mini Checkered in Beige – http://bit.ly/3cmkxtW
The buttons I used in the video:
https://www.etsy.com/shop/arrowmountain
The sewing machine I have:
Bernette B37 Swiss Design Computerized Sewing Machine
https://amzn.to/3etYaFE (USA)
LDH Scissors and thread snip
http://bit.ly/3vbHj04
Clover Water Soluble Marker Eraser
Canada https://amzn.to/3tebClb
USA https://amzn.to/38tei6a
Wash Away Stabilizer
Canada https://amzn.to/3l2Noau
USA https://amzn.to/30ttUCq
Craft Clips
Canada https://amzn.to/32vmK2u
USA https://amzn.to/3sjKKiU
Flat Head Pins
Canada https://amzn.to/2IaKoKm
USA https://amzn.to/32slD31
Point Turner
Canada https://amzn.to/39rgfQA
USA https://amzn.to/3qjfKyA
Wash-away Wonder Tape
Canada https://amzn.to/35DUwUj
USA https://amzn.to/39ylJc2
Seam Allowance
Use 3/” seam allowance unless otherwise stated
Material
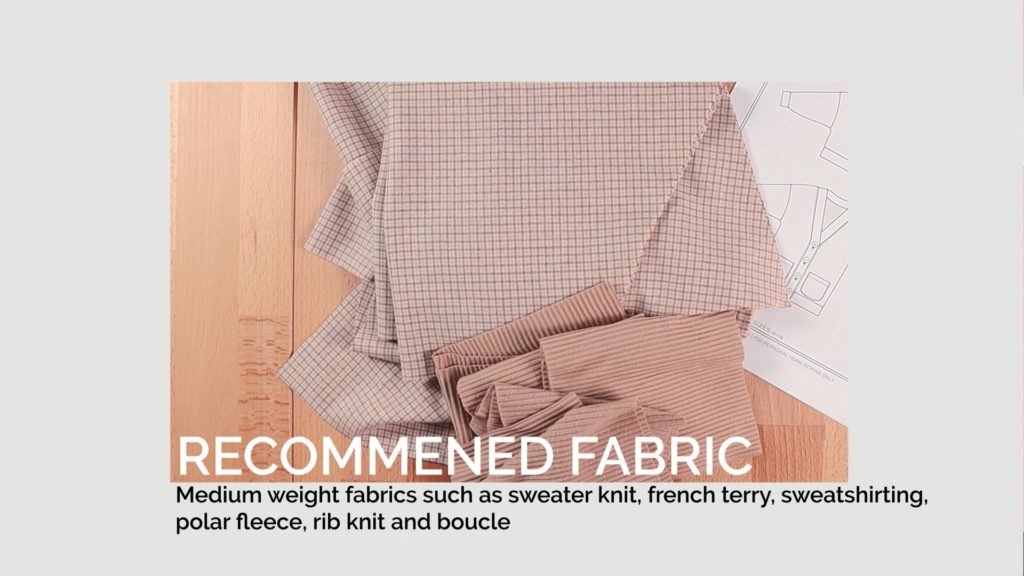
Marlo Pattern from True Bias, Lightweight Iron-On Fusible Interfacing, Medium weight fabrics such as sweater knit, french terry, sweat-shirting, polar fleece, rib knit and boucle
Optional
3~5 Buttons
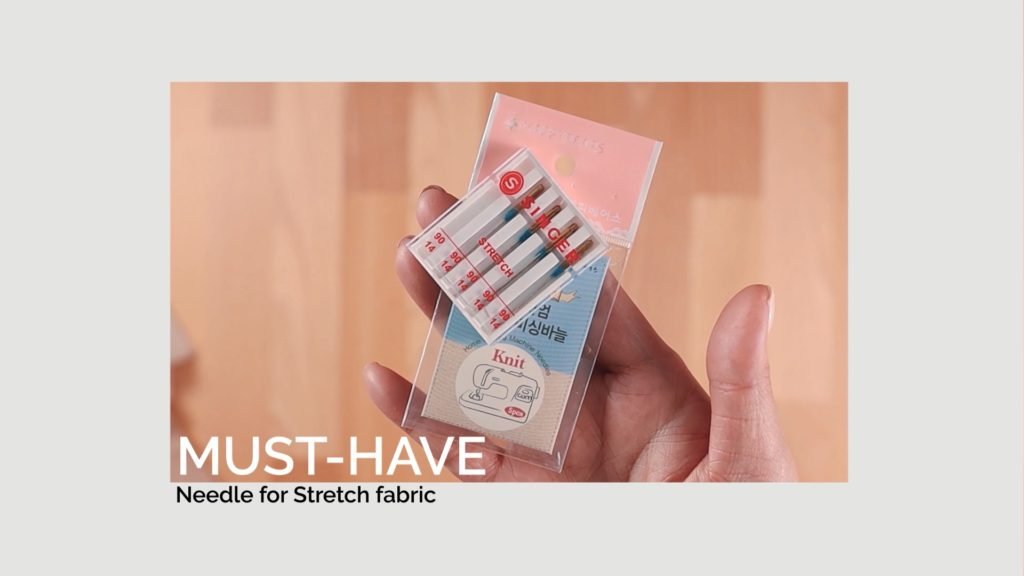
Must-Have
Needle for Stretch fabric
Optional
Walking Presser Foot
Cut
2 Neckband Interfacing, 2 Front (Mirrored), 1 Back (On Fold), Cut 2 Sleeve (On Fold), 2 Wristband, 1 Waistband, 2 Neckband
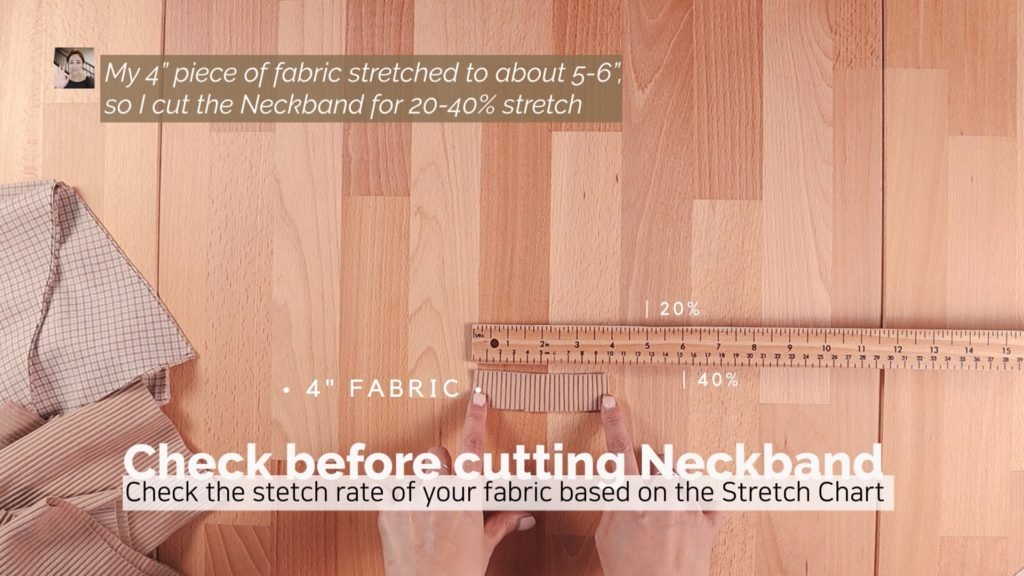
My 4″ piece of fabric stretched to about 5-6″, so I cut the Neckband for 20~40% stretch
Check before cutting Neckband
Check the stretch rate of your fabric based on the Stretch Chart

0. Preparation
Pin and sew the short edges of Neckband with the double notches RST (Right Side Together)
Try out some stitches that will work with your stretch fabric
Fold in half lengthwise for a guide WST (Wrong Side Together)
Apply Fusible Interfacing to stabilize the button/buttonhole area
**Interfacing will give the area additional strength and support
1. Assemble Bodice
Pin and sew Front Bodice and Back Bodice at shoulders RST
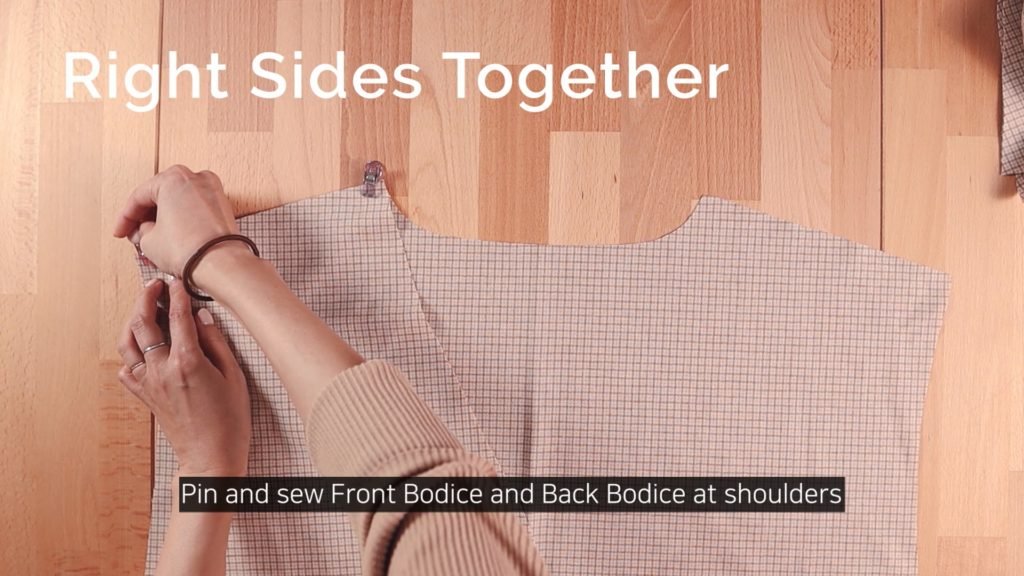
Press the seams towards the back
2. Assemble Sleeves
Pin and sew the Sleeve to Bodice RST
**For sewing curved armscyes, I start at the center without pinning the fabric
Serge the area you sewed
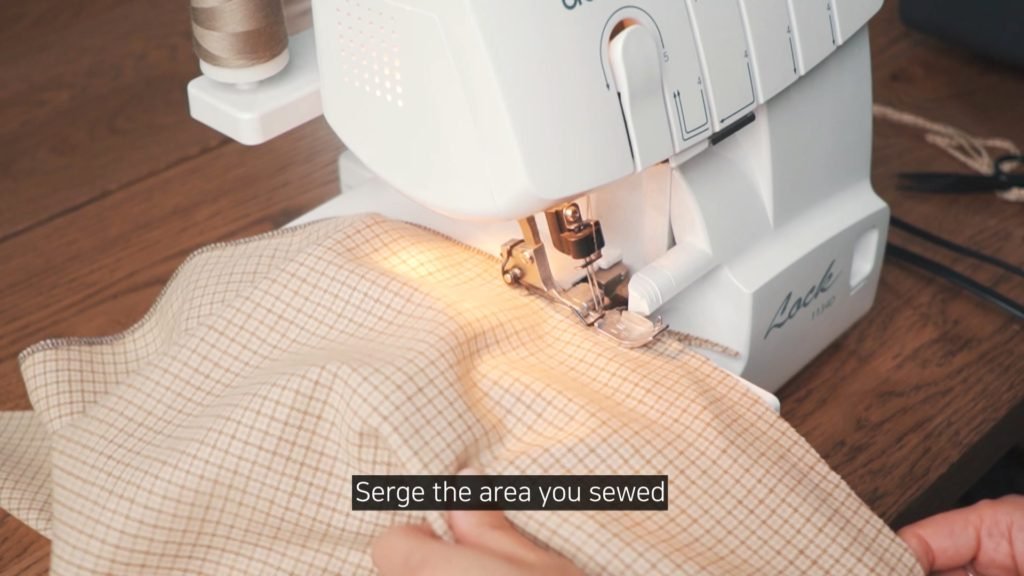
Pin and sew underarm and side seam RST
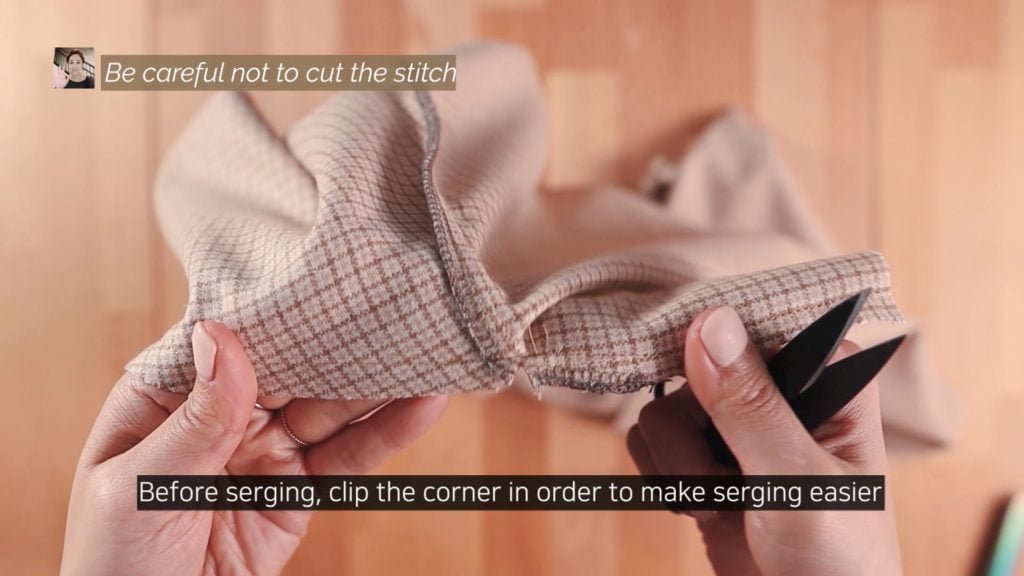
Pivot when you meet the stitch at the shoulder
Before serging, clip the corner in order to make serging easier
3. Waistband
Fold Waistband in half lengthwise WST
Pin the raw edges of Waistband and Bodice matching notches RST
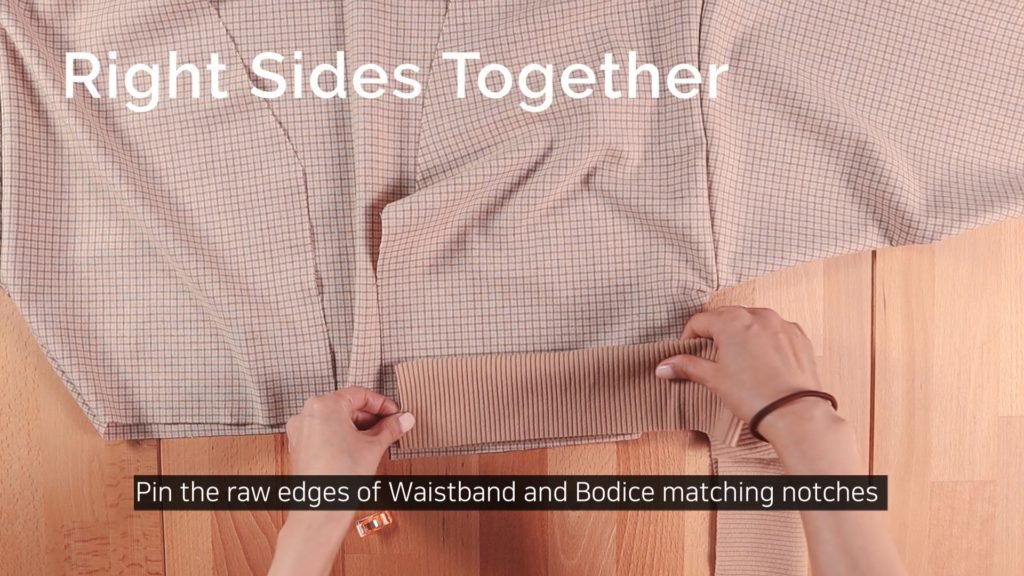
It’s natural that the Waistband is shorter
Sew
Sew the Waistband, stretching it to fit the length
And serge
Press the seam towards the Bodice
4. Neckband
Fold Waistband in half lengthwise RST
Sew the short edges
Turn right side out and press
Pin the raw edges of the Neckband and neckline, matching the notches
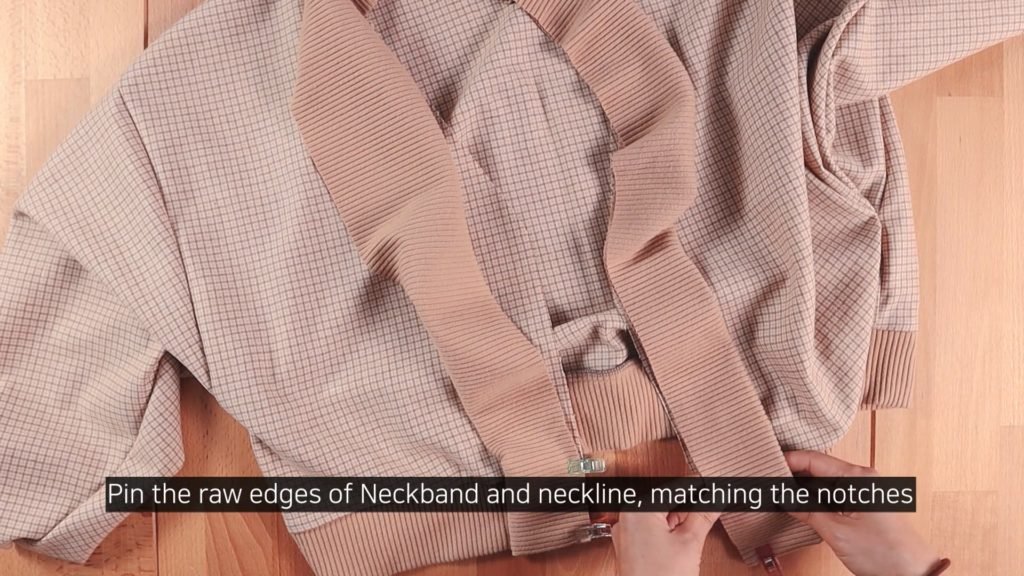
Sew the Neckband, stretching it to fit
Serge
Press the seam towards the Bodice
Hide the tail of serging stitch under the seam
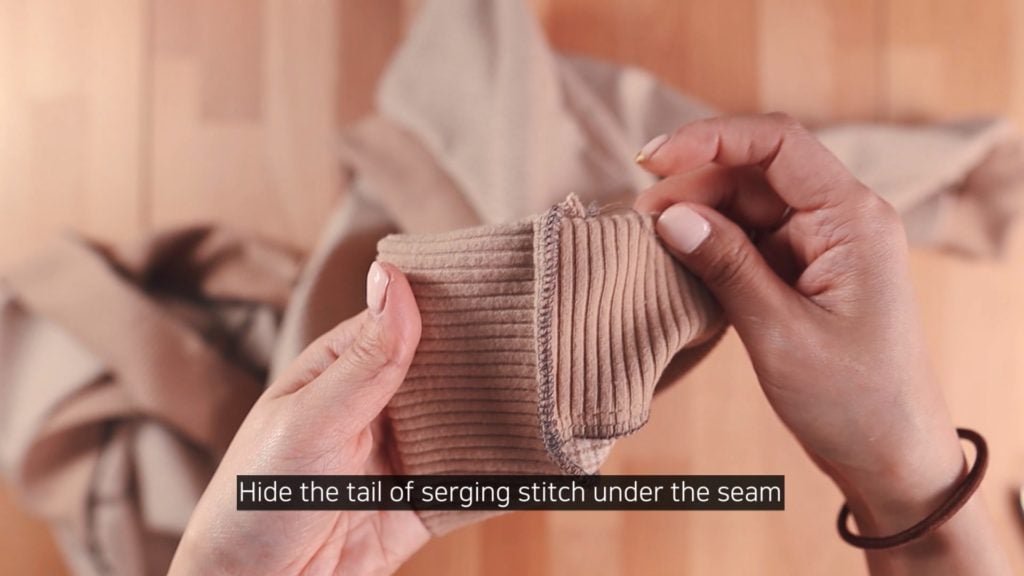
And topstitch
5. Wristband
Fold the Wristband in half and sew the short edge RST
Open the seam, fold it in half lengthwise and press WST
Slip the Sleeve into the Wristband
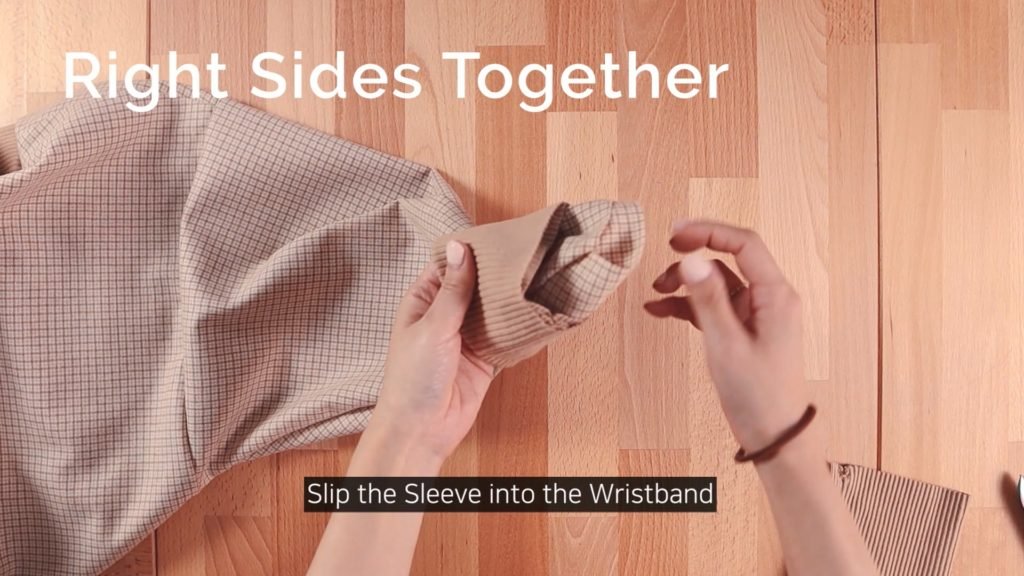
Pin the raw edges
Sew the Wristband, stretching it to fit
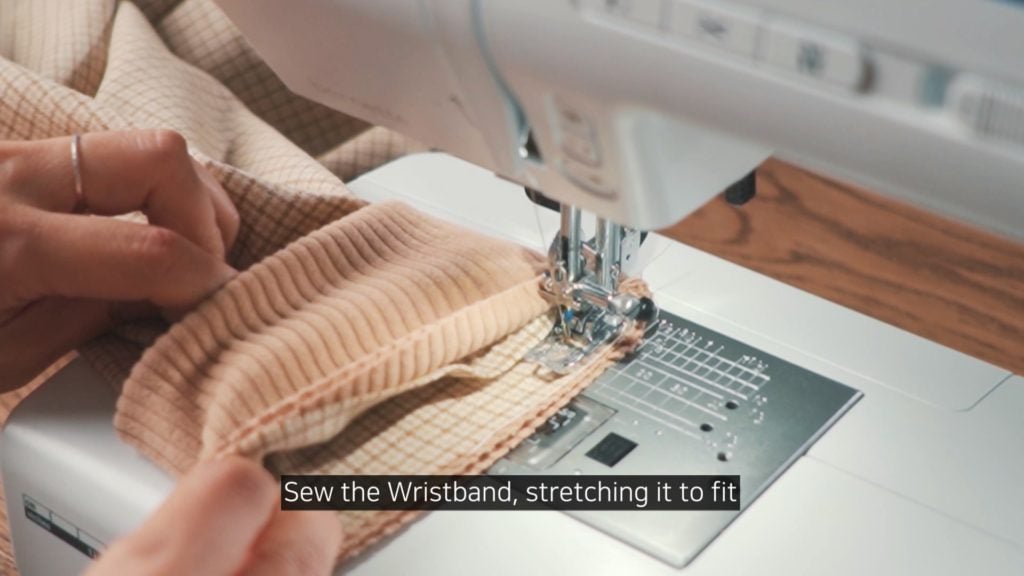
Serge
6. Button + Buttonhole
Make the buttonholes and attach the buttons to your preferred positions
**Every machine has different settings for making buttonholes, so check your manual

**I use a Soluble Marker Eraser to remove marks
**I used a Wash-Away Soluble Stabilizer under the fabric to reduce the friction between the presser foot and the fabric
**A few drops of Fray Check Liquid will help stop further fraying
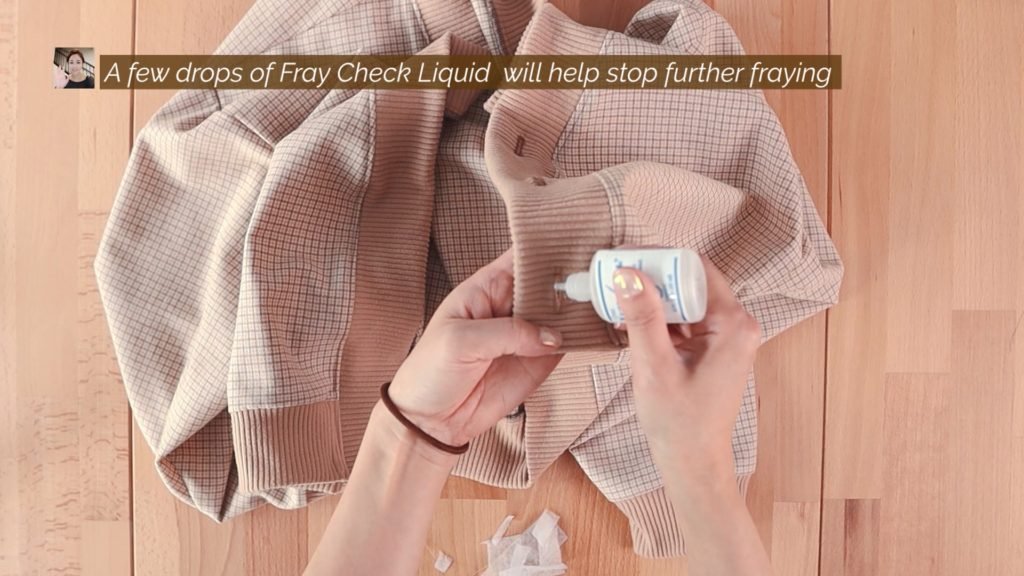
And that’s it for the Marlo Sweater! I would love to hear what you think in the comments below as well as any questions you have – I’m here to help! I can’t wait to see your version of the Marlo Sweater.
And please sign up to our Sewing Therapy Blog. So you will receive updates on NEW Sew Along Tutorials whenever released!
Thanks for reading! I will see you in the next tutorial!
I will see you in the next post! Thanks!
*****Disclosure******
Some of the links above are affiliate links. .Clicking and purchasing through affiliate links gives me a small commission. BUT MORE IMPORTANTLY, I wanted to help you find the materials easier. So you can focus more on your project. Thank you.
**********************
Here’s my Patreon page link. Your support is greatly appreciated! https://www.patreon.com/user?u=32815284
Let’s get connected!
Sewing Therapy
Instagram – https://www.instagram.com/yoursara_k/
Blog – http://sewingtherapy.net/
Twitter – https://twitter.com/SewingTherapy
Dailylike Canada
Instagram – https://www.instagram.com/dailylikecanada
Facebook – http://www.facebook.com/dailylikecanada
Pinterest – https://www.pinterest.ca/dailylikecanada
Two O Nine Fabric Studio
Instagram –https://www.instagram.com/twooninefabric.ca
