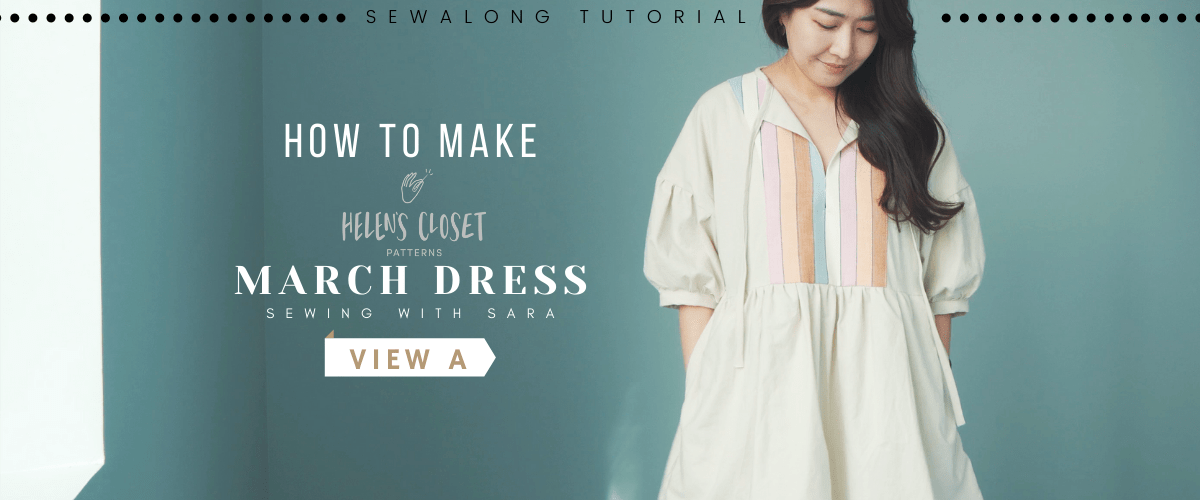
I’m so excited and honored to make a sew-along video in collaboration with Helen’s Closet to celebrate the release of her latest pattern. Hello, Sara here, bringing you a tutorial for Helen’s Closet’s newest pattern: The March Top and Dress!
Helen describes this March Dress as a fun retro-style pattern featuring voluminous sleeves with a gathered skirt when made as a dress and a gathered or straight peplum when made as a top. Helen’s favorite feature: the interfaced front and back panels that are great for contrasting fabrics, stripe direction, or embellishment. The possibilities to make this dress uniquely yours are endless.
My favourite features are the gathered sleeves and deep inseam pockets. This pattern also features an optional neck tie, which combined with the puffed sleeves make this dress so charming. I think matching mom and daughter dresses would be so fun.
Whichever view you decide to make, I’ll walk you through the steps and show you some of my tips to successfully make this gorgeous dress.
Other LOVELY patterns from Helen’s Closet Patterns
Gilbert Top http://sewingtherapy.net/gilbert-top-tutorial/
Pona Jacket http://sewingtherapy.net/pona-jacket-sew-along-tutorial/
Winslow Culottes http://sewingtherapy.net/winslow-culottes-tutorial/
So, I strongly recommend watching the video if you have things that you couldn’t understand.
These are my online fabric shops.
Dailylike Canada http://www.dailylike.ca
Two O Nine Fabric Studio https://twooninefabric.ca
Material
March Top and Dress Pattern from Helen’s Closet
https://helensclosetpatterns.com/product/march-top-and-dress/
The fabrics I used in the video:
Warp + Weft Wovens Jubilee in Sprinkles by Alexia Abegg – Ruby Star Society
http://etsy.me/3cc8Nvh
Dailylike Washing Cotton in Warm Beige
http://bit.ly/3f0xY5I
The sewing machine I have:
Bernette B37 Swiss Design Computerized Sewing Machine
https://amzn.to/3etYaFE (USA)
LDH Scissors and thread snip
http://bit.ly/3vbHj04
The items I always use for my sewing project
Craft Clips
Canada https://amzn.to/32vmK2u
USA https://amzn.to/3sjKKiU
Flat Head Pins
Canada https://amzn.to/2IaKoKm
USA https://amzn.to/32slD31
Point Turner
Canada https://amzn.to/39rgfQA
USA https://amzn.to/3qjfKyA
Wash-away Wonder Tape
Canada https://amzn.to/35DUwUj
USA https://amzn.to/39ylJc2
Let’s get started!

Seam Allowance
Use 5/8″ seam allowance unless otherwise stated
Material
March Top and Dress Pattern from Helen’s Closet
**Recommended Fabric: Light to medium woven fabrics with no stretch
Cut
1 Front (On fold)
1 Front Panel, 1 Back Panel
2 Sleeve (Mirrored)
2 Sleeve Cuff
Neck Tie (Bias Cut)
2 Skirt, 2 Pocket


0. Preparation
**Interfacing will give the area additional strength and support
Fuse the interfacing tot he wrong sides of Front/Back Panels and Sleeve Cuffs
Fuse the interfacing piece to the RIGHT SIDE of the Front center
**If you want a longer neck opening, use the corresponding length of interfacing
Staystitch the necklines
**Staystitch prevents bias/curved areas from stretching out

1. Panel
Pin and sew Front Panel and Back Panel at shoulders RST (Right Side Together)
Press the seam towards the Front
Fold and press the side edges in by 1/4″ WST (Wrong Side Together)
And set it aside
2. Bodice
Pin and sew Front and Back at shoulders RST

Serge
Press the seams towards the Back
Pin the neckline matching the stitch line and notches
Wrong side of Bodice + Right Side of Panel

Pin the Panel to the Bodice at the bottom
Draw a line at the center for the Neck Opening

Pin around the line to hold the fabrics
Mark 1/4″ away from the center
Draw a line from the mark to the end of the center line
** I drew a straight line 1″ away from the end point and connected the lines to make the point wider and rounded as it’s very difficult to cut a narrow point neatly

Sew the V line with shorter stitch length
Cut the center line for Neck Opening
**At the end point, cut as close to the stitch as you can, being careful not to cut the stitch

Turn the right side out and see how the endpoint looks from outside
If you have crinkles at the point, it means you need to cut closer to the stitch
Turn inside out again and try to cut closer to the stitch
**If you accidentally cut the stitch, don’t panic! Just draw a new set of lines outside your existing lines and redo the previous steps 🙂
It looks much better

Give it a nice press
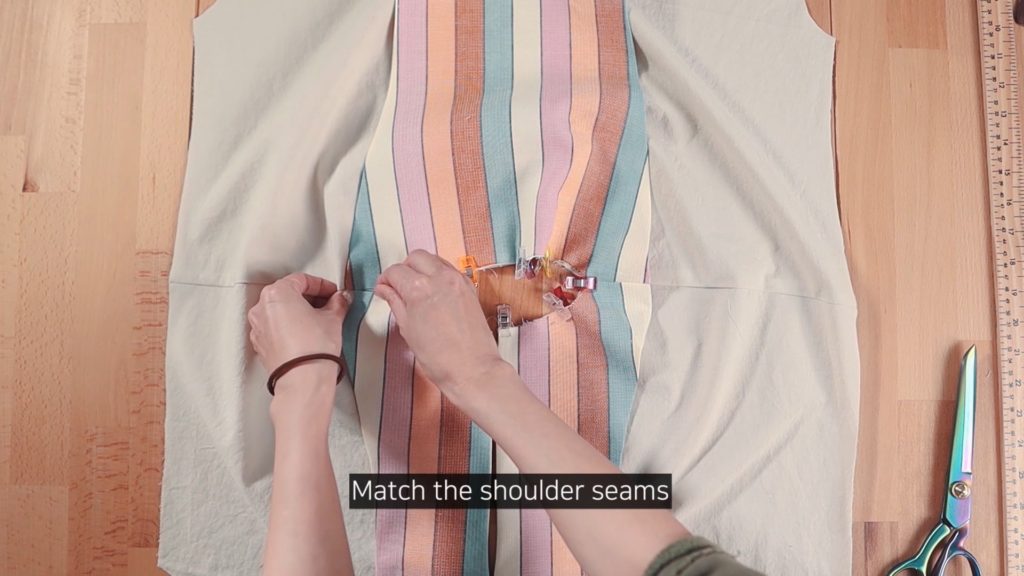
Pin the neckline again
Match the shoulder seams

Baste
**Basting is sewing to hold layers in place temporarily
Pin the Panel to the Bodice, matching all the notches
Make sure both layers lay flat nicely
Edgestitch/Topstitch the sides of Panel to the Bodice


3. Sleeve
Prepare for the making gathers on the top and bottom edges of the Sleeves
** I used a Zig-Zag Stitch Gathering Method


Pin the Sleeve to the Bodice, adjusting gathers to match the width RST
Sew
** Sewing on the side of gathers is easier to control
Remove the yarn before serging
Serge

Pin and Sew the underarm and side seam RST
** Don’t sew over the stitches for gathers
Serge
4. Sleeve Cuff
Fold the Sleeve Cuff in half and sew the short edges RST
Open the seam
Fold 1/2″ of one edge and press WST
Slip the Sleeve into the Sleeve Cuff
Pin the stitch line and the notches

Sew
Remove the yarns
Press the Sleeve Cuff to the seam
Turn right side out
Fold the Sleeve Cuff in half and wrap the seam

Cover the stitch line and topstitch/edgestitch

5. Pocket
For this step, I deviated from the original instructions for beginners
Serge the bottom of the Pocket
Pin and sew the Pocket to one of the raw side edge of Skirt RST
Serge the sewn area
Press the Pocket towards the seam and edgestitch

Pin the other side of Pocket to the raw side edge of other Skirt piece RST
Repeat all other steps
Fold the Pocket in half and match all the edges RST

Pin around the Pocket
Sew from the top to the first notch and the second notch to the bottom
The stitch will stay inside of the main stitch

** Backstitching a few times at the notches will secure the Pocket Opening
Sew the bottom of the Pocket until you meet the main stitch
Serge the unserged area of the side seam

Now Baste the Pocket to the Front Skirt
Repeat all the steps for the other Pocket
6. Skirt
Make gathers with your preferred method
Slip the Bodice into the Skirt RST

Match the side seams and notches and pin
Sew
Serge
7. Neck Tie
Place one Neck Tie on top of the other at a right angle RST
Sew diagonally from corner to corner
Trim and open the seam
Pin the center of Neck Tie to the neckline of the Back
Wrong side of Bodice + Right Side of Neck Tie

Sew from the center to the Neck Opening (3/8″ seam allowance)

Press the Neck Tie towards the seam
Double fold, wrap the seam and pin
Make a tie with bias binding method

Edgestitch all the way around the neckline

8. Hem
Serge the bottom edge
Fold in your preferred length, press and sew
*Making Gathers
1. The most common method: Use two parallel stitches
Using the longest stitch setting, sew 2 parallel lines on the edge
Leave tails of the thread for gathering
Distribute the gathers evenly
Tie off the thread when the sleeve hem reaches the desired width

2. New Found Method via @sewbakemake on Instagram : Use any kind of cord/yarn and a zigzag stitch
Zigzag-stitch using the setting
Be careful not to sew on the yarn

Pull the cord/yarn to make gathers
And that’s the end of this tutorial! I love this dress and have a feeling it will become a favorite season. I would love to hear your questions and comments in the section below
please sign up for our Sewing Therapy Blog. So you will receive updates on NEW Sew Along Tutorials whenever released!
Thanks for reading! I will see you in the next tutorial!
*****Disclosure******
Some of the links above are affiliate links. .Clicking and purchasing through affiliate links gives me a small commission. BUT MORE IMPORTANTLY, I wanted to help you find the materials easier. So you can focus more on your project. Thank you.
**********************
Here’s my Patreon page link. Your support is greatly appreciated! https://www.patreon.com/user?u=32815284
Let’s get connected!
Sewing Therapy
Instagram – https://www.instagram.com/yoursara_k/
Blog – http://sewingtherapy.net/
Twitter – https://twitter.com/SewingTherapy
Dailylike Canada
Instagram – https://www.instagram.com/dailylikecanada
Facebook – http://www.facebook.com/dailylikecanada
Pinterest – https://www.pinterest.ca/dailylikecanada
Two O Nine Fabric Studio
Instagram –https://www.instagram.com/twooninefabric.ca
