Zero Waste Coat (Make Nine No.8) | Sew Along Tutorial from Sewing Therapy

Hello! I’m Sara and welcome back to Sewing Therapy. Today’s sew-along tutorial is for the Zero Waste Coat by Birgitta Helmersson. This is my second ZW pattern by Birgitta and like the ZW Dress, the ZW Coat is an incredible pattern. I was pleasantly surprised to find out that it …

Closet Core Pattern’s Amy Jumpsuit | Sew Along Tutorial from Sewing Therapy

Hello and welcome back. I’m Sara, here to sew along with you, walking you through each step so that you can successfully complete your very own Amy Jumpsuit by Closet Core Patterns! The Amy Jumpsuit is one of my #makenine2021 projects and I was so happy to finally get to …

McCall’s M7974 Very Adorable yet Elegant | Sew Along Tutorial from Sewing Therapy

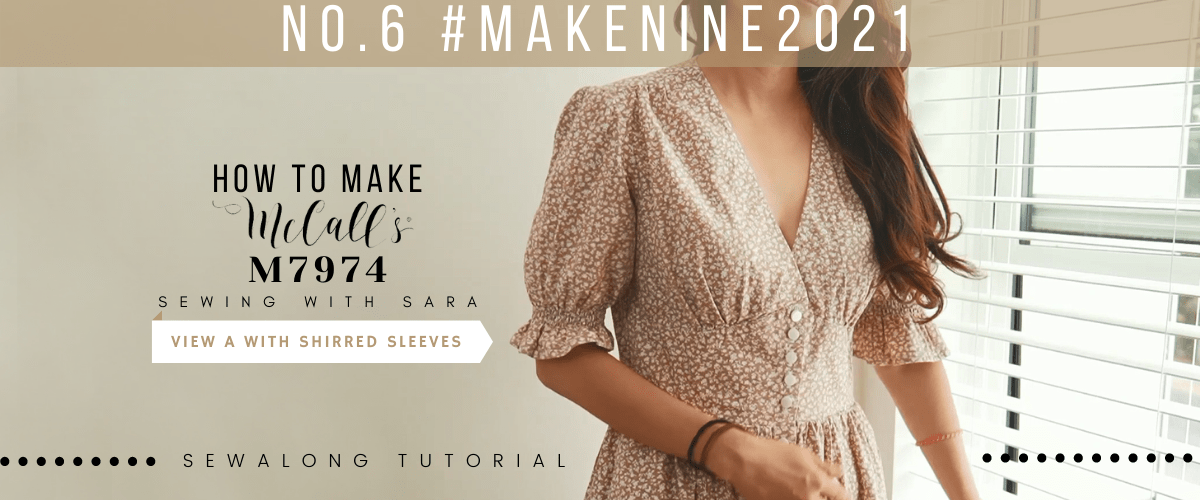
Hello, Sara here with a new pattern and a new tutorial! Normally I stay away from fitted dresses but I had to make two after seeing what Katia of @sew_sewphisticated made. I decided to make my own versions of McCall’s m7974, and guess what, I love them more than I thought I would! There are four views in the pattern and I made View A with shirred sleeves and View D without the collar. You will sew along View A with me in this video.

I heard there can be difficult sizing issues with this dress so I recommend that you make a toile version before committing to the final version.

There are a couple of ways you can adjust the fit without cutting into the fabric. One is to attach the buttons closer to the inside of the dress and the other is to increase the seam allowance on the side seams of the Bodice before assembling it to the Skirt.

For both dresses, I tried to keep a strict 5/8” seam allowance and that worked well for me, although I want to add just one more button on top as the neckline is too wide for me when I sit or bend over.

Alright, make sure to sign up and do not miss out on upcoming events, tutorials, giveaways etc.
Let’s get started!

So, I strongly recommend watching the video if you have things that you couldn’t understand.

Material

The pattern I used
M7974 from McCall’s Pattern
https://somethingdelightful.com/m7974

The fabrics I used in the video:
View A with shirred sleeves in beige floral:
PINE FOR PRAIRIE – Country Flower Cotton 100%
https://bit.ly/3jwMOlb

View D without collar in navy floral :
Pompon Bunch Cotton 100%
https://bit.ly/2WPll6j

The sewing machine I have:
Bernette B37 Swiss Design Computerized Sewing Machine
https://amzn.to/3etYaFE (USA)

LDH Scissors and thread snip
http://bit.ly/3vbHj04

The items I always use for my sewing project

Tailor’s Chalk Pencil
http://bit.ly/chalkpencil

Poly Sewing Thread
https://twooninefabric.ca/collections/sewing-thread

Lightweight Fusible Interfacing
http://bit.ly/fusible_interfacing

Craft Clips
Canada https://amzn.to/32vmK2u
USA https://amzn.to/3sjKKiU

Flat Head Pins
Canada https://amzn.to/2IaKoKm
USA https://amzn.to/32slD31

Point Turner
Canada https://amzn.to/39rgfQA
USA https://amzn.to/3qjfKyA

Wash-away Wonder Tape
Canada https://amzn.to/35DUwUj
USA https://amzn.to/39ylJc2

These are my online fabric + sewing accessories shops.  

Dailylike Canada
http://www.dailylike.ca

Two O Nine Fabric Studio
https://twooninefabric.ca  

Seam Allowance
Use 5/8″ seam allowance unless otherwise stated

Material
M7974, buttons, fusible lightweight interfacing (Optional), Elastic Thread (Optional)

Recommended Fabric
Cotton Blends, Crepe, Lawn, Charmeuse, etc

Cut
2 Front Bodice (Mirrored), 1 Back Yoke, 1 Back Yoke Facing, 1 Back Bodice, 2 Front Facing (Mirrored and Interfaced), 2 Sleeve, 2 Front Midriff (Mirrored), 2 Midriff Facing (Mirrored and Interfaced), 2 Skirt Front, 4 Side Skirt, 1 Back Skirt (On Fold), 4 Pocket (Mirrored)

1. Staystitch
* It prevents bias/curved areas from stretching out
Staystitch all the necklines and armholes

2. Bodice
Gather upper and lower edges of Front Bodice between notches
* I use my two favourite methods for the gathers. I recommend you watch my gathering Method video in case you want more detailed instructions!
Pin Front Bodice and Back Yoke at shoulders RST (Right Sides Together)
Sew leaving the gathered area
Adjust gathers, sew, and serge
Press the seam toward Back Yoke
Gatherstitch between the notches
Pin Back Yoke and Back Bodice matching the notches RST
Sew leaving the gathered area
Adjust gathers, sew, serge
Press the seam towards Back Yoke

3. Facings
Finish outer edge of Front Facing in your preferred method
Pin and sew Back Yoke Facing and Front Facing at shoulders RST
Press the seam toward Yoke Facing WST (Wrong Side Together)
Fold and press the seam allowance on lower edge of Back Yoke Facing
Pin Facing to Bodice, matching all the notches RST
Sew the neckline
Trim the seam
Sinp the curved neckline
Understitch Facing
*Understitching is stitching that is sewn as close to the seam line as possible holding the seam to the facing or lining
Turn Facing inside and press
Cover the shoulder seams with Facing and pin
*I recommend you either pin all around the Facing or use Wash-Away Wonder Tape
Cover the Yoke seam with Facing and pin
Edgestitch/topstitch or stitch in the ditch from the right side

4. Midriff
Pin Front Midriff and Front Bodice RST
Sew leavign the gathering area
Adjest gathers and sew
Pin the Midriff Facing and sew
Pin and sew Front Midriff and Midriff Facing at the front RST
Be careful not to catch the Front Bodice piece
*For the best look, you need to sew as close to the Bodice at the corner as you can
Snip the corner
Turn right side out and press
Pin and sew Front Bodice and Back Bodice at sides RST
Serge

5. Sleeves (I modified the sleeves into shirred sleeves I’ll just share my process briefly)
*Please watch the video (12:29 <- Video Timeline)

6. Skirt and Pocket
(Optional) Interface the front edge of Front Skirt panel
Or doublefold and press
Pin the Pockets to the Side Skirt panels and sew RST
Serge the stitched area
Press the Pocket toward the seam
Understitch
Pin the Side Skirt and Pocket at sides RST
Mark the notches
Sew
Sew 1/8″ inside of the stitch
*Extra backstitching will secure the opening of the Pocket
Serge the sides
Snipping the corner will help serging
Send each Pocket to opposite direction and press
Baste the Pocket to the Skirt
Sew Front Skirt and Side Skirt panel at the side the Pocket lays towards RST
Sew Back Skirt and Side Skirt panel RST
Sew Back Skirt and the other Side Skirt panel RST
Sew Side Skirt panel and Front Skirt RST
And serge all the seams

7. Assemble Bodice and Skirt
Prepare for the gathering with your preferred method
Divide sections into three at the side seams
Sew Bodice and Skirt at the waist RST
Match the end of Bodice at the notch on the Skirt
Adjust gathers and pin
Serge only between notches

8. Front Facing and Hem
Fold the self-facing toward the right side and sew RST
From the top of Midriff, topstitch/edgestitch
Fold the self-facing toward the right side at notch
*In case you are using heavier weight fabrics or want a neat finish, follow this extra step
Sew where you want to hem
Trim the extra layers
Turn right side out doublefolding the bottom hem
Doublefold the entire hem and press
Topstitch/edgestitch

9. Button and Buttonhole
*Make buttonholes using your machine’s instructions. Refer to my short video on buttonholes for more help

Alright. That’s it for the my MakeNine 2021 project #6. Thank you very much for reading and watching! I will see you in my next post!

*****Disclosure******
Some of the links above are affiliate links. Clicking and purchasing through affiliate links gives me a small commission. BUT MORE IMPORTANTLY, I wanted to help you find the materials easier. So you can focus more on your project. Thank you.
**********************

Let’s get connected!
Sewing Therapy
Instagram – https://www.instagram.com/yoursara_k/
Blog – http://sewingtherapy.net/ ​  

Dailylike Canada
Instagram – https://www.instagram.com/dailylikecanada
Facebook – http://www.facebook.com/dailylikecanada ​
Pinterest – https://www.pinterest.ca/dailylikecanada ​  

Two O Nine Fabric Studio
Instagram –https://www.instagram.com/twooninefabric

A Comfy Yet Very Elegant Cambria Duster from Friday Pattern Co. | Sew Along Tutorial from Sewing Therapy

Hello! I am Sara, your virtual sewing instructor where I help you create beautiful garments from popular patterns. Today’s tutorial is all about the Cambria Duster by Friday Pattern Co.! Before I jump into today’s pattern, I wanted to address asking me to share pattern measurements. While you may be …

The very popular Pinnacle Top by Papercut Patterns | Sew Along Tutorial from Sewing Therapy

Hello! It’s Sara here with another tutorial. Today’s tutorial is for the very popular Pinnacle Top by Papercut Patterns. It’s so fantastic that with one pattern you can make three variations of this top. I made Variation 1 and it’s the easiest of the three to make! I love the …

‘Unique Features & Timeless Design’ Cielo Top / Cielo Dress by Closet Core Patterns | Sew Along Tutorial from Sewing Therapy

Hello! I’m Sara, your virtual sewing instructor! Today’s tutorial is for the Cielo Top / Cielo Dress by Closet Core Patterns. This pattern creates a semi-cropped top and a shift dress, but with some unique features that help set this pattern apart from others, such as hidden pockets and angled …

The ‘Popular’ McCalls M7969 (MakeNine 2021) No.2 | Sew Along Tutorial from Sewing Therapy

Hi, Sara here. If you’re on Instagram, you’ve probably seen so many McCalls m7969 dresses in your feed. It’s very popular with good reason! This loose-fitting pullover dress features dramatic sleeves and is easy to sew and easy to wear, without sacrificing style. This pattern is a perfect challenge for a beginner and I hope this tutorial will help you in this dreamy dress sewing. This pattern includes a few variations, and has room for you to experiment with different hacks. Are you ready to jump on the m7969 bandwagon with me?

Also check out Make Nine 2021 No.1 Project Gilbert Top from Hellens Closet,
http://sewingtherapy.net/gilbert-top-tutorial/

So, I strongly recommend watching the video if you have things that you couldn’t understand.

M7969 Pattern from McCall’s Fabric
https://somethingdelightful.com/pdm7969

The fabrics I used:
Navy Floral Cotton Linen Blend – http://bit.ly/3utCDSO
Olivia Linen Blend in Navy – http://bit.ly/2NXfJm6

My sewing machine
Bernette B38 Swiss Design Computerized Sewing Machine
https://amzn.to/2URpvX6 (USA)

LDH Scissors and thread snip
https://twooninefabric.ca/collections/ldh-scissors

Craft Clips
Canada https://amzn.to/32vmK2u
USA https://amzn.to/3sjKKiU

Flat Head Pins
Canada https://amzn.to/2IaKoKm
USA https://amzn.to/32slD31

Point Turner
Canada https://amzn.to/39rgfQA
USA https://amzn.to/3qjfKyA

Wash-away Wonder Tape
Canada https://amzn.to/35DUwUj
USA https://amzn.to/39ylJc2

Let’s get started

SEAM ALLOWANCE
Use 5/8″ seam allowance unless otherwise stated

Material
M7969 from McCall’s Fabric (Lawn, Crepe De Chine, Challis, Georgette suggested)

Cut
2 Bodice Front (Mirrored), 2 Neck Binding (Mirrored), 1 Bodice Back, 2 Sleeve (Mirrored), 2 Sleeve Binding, 2 Skirt

0. Preparation
*Interfacing will give the area additional strength and support
Apply interfacing to the wrong side of Neck Binding

1. Assemble Bodice
Pin Bodice Front to Bodice Back at side seams
Sew and serge

2. Sleeve
Prepare for making gathers on the upper and bottom edges of the Sleeve between the notches
*I used a Zig-Zag Stitch Gathering Method on this project. At the end of the video, I’ll share more information about this method as well as the more common method for making gathers

Sew Sleeve seams RST (Right Side Together)
Don’t sew over the stitches for your gathers
And serge
Fold Sleeve Binding in half and sew the short edges RST

Open the seam
Fold 3/8″ of one edge and press WST (Wrong Side Together)
Adjust gathers to match the width of Sleeve Binding
Slip the Sleeve into the Sleeve Binding and match the notches
Adjust gathers and sew with 3/8″ seam allowance
*Sewing on the side with gathers is easier to control

Press the Sleeve Binding towards the seam
Fold the Sleeve Binding in half and wrap the seam

Topstitch/edgestitch covering the stitch line slightly

3. Assemble Bodice and Sleeve
Pin the Sleeve to armhole matching notches RST
Sew and serge
Repeat for the other Sleeve
Press the seam towards the Bodice

4. Neckline
Sew the short straight edges of Neck Binding
Open the seam

Fold one edge of Neck Binding and press
Pin Neck Binding to Front Bodice and Back Bodice
Instead of matching corners, match the soon-to-be stitched line
Pin the Neckline, leaving the Sleeve parts

Repeat for the other side
Sew the neckline of Back Bodice
Sew the neckline of Front Bodice, leaving the Sleeve parts

Adjust the Sleeve gathers to fit in the remaining Neck Binding
And sew
Remove the yarn
Press Beck Binding towards the seam

Trim the seam
Fold the Neck Binding in half and wrap the seam
Cover the stitch line slightly and edgestitch or stitch in the ditch
*Pinning before sewing is recommended for beginners
Overlap the Front Bodice according to your preference and baste
*Baste is to sew with long loose stitches to hold layers n place temporarily

5. Skirt
Sew the side seams and serge RST
Make gathers with your preferred method
Adjust the gathers to match the width to the waist

Slip the Bodice into the Skirt RST
Match and pin the side seams and centres of the Bodice and Skirt
And match the rest of the skirt by adjusting the gathers
Sew and serge
Double-fold the hem and edgestitch/topstitch

*Making Gathers
1. The most common method : use two parallel stitches
Using the longest stitch setting, sew 2 parallel lines on the edge
Leave tails of the thread for gathering
Distribute the gathers evenly

Tie off the thread when the sleeve hem reaches the desired width

2. New Found Method via @sewbakemake on Instagram : use any kind of cord/yarn and a zigzag stitch
Cut any kind of cord/yarn a bit longer than the circumference of the sleeve hem
Zigzag-stitch using the setting
Be careful not to sew on the yarn
Pull the cord/yarn to make gathers

I hope this tutorial helped you create your own fun and flouncy dress that is comfy to wear and satisfying to make! I can’t wait for some warmer weather to wear my latest dresses. I will see you in the next post! Thanks!

And please sign up to our Sewing Therapy Blog. So you will receive updates on NEW Sew Along Tutorials whenever released!
Thanks for reading! I will see you in the next tutorial!

*****Disclosure******
Some of the links above are affiliate links. .Clicking and purchasing through affiliate links gives me a small commission. BUT MORE IMPORTANTLY, I wanted to help you find the materials easier. So you can focus more on your project. Thank you.
**********************

Here’s my Patreon page link. Your support is greatly appreciated! https://www.patreon.com/user?u=32815284

Let’s get connected!
Sewing Therapy
Instagram – https://www.instagram.com/yoursara_k/
Blog – http://sewingtherapy.net/
Twitter – https://twitter.com/SewingTherapy

Dailylike Canada
Instagram – https://www.instagram.com/dailylikecanada
Facebook – http://www.facebook.com/dailylikecanada
Pinterest – https://www.pinterest.ca/dailylikecanada

Two O Nine Fabric Studio
Instagram –https://www.instagram.com/twooninefabric.ca


Gilbert Top from Helen’s Closet Patterns | Sewing Along Tutorial by Sewing Therapy

Hello, Sara here. Happy new year everyone! I’m so excited for all the creations to come in 2021. The first tutorial of the year 2021 is Helen’s Closet Patterns’ The Gilbert Top! It’s a modern take on a classic boxy button-up shirt with two options: View A with a tie-front …

Back to Top