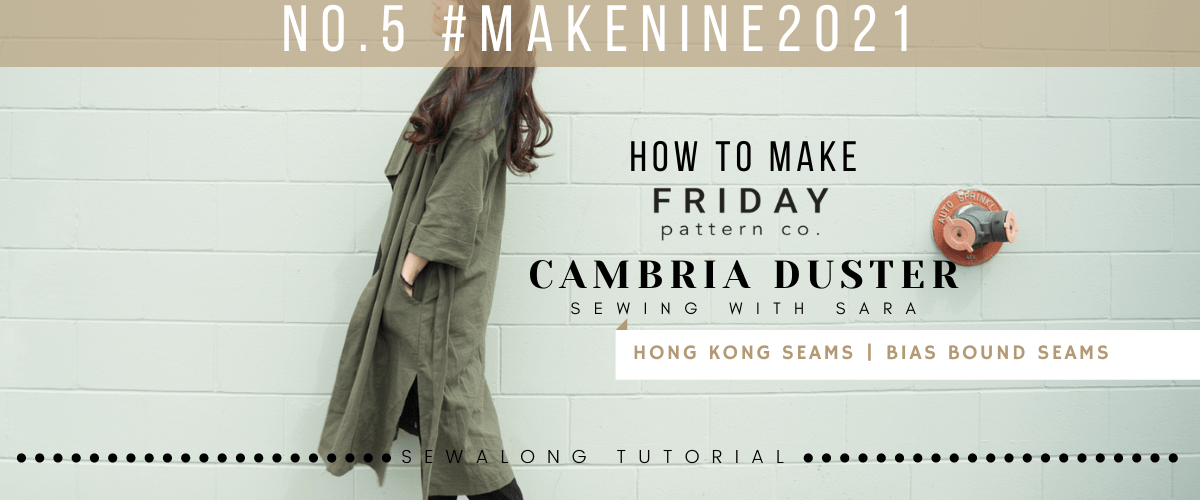
Hello! I am Sara, your virtual sewing instructor where I help you create beautiful garments from popular patterns. Today’s tutorial is all about the Cambria Duster by Friday Pattern Co.!
Before I jump into today’s pattern, I wanted to address asking me to share pattern measurements. While you may be used to other YouTube channels that offer free patterns and measurements, I fully support pattern designers and makers by purchasing their patterns and honor their work by not sharing any measurements. The goal of Sewing Therapy to help my sewing community sew the same garments where you may have difficulty following the instructions. And I love to share the amazing patterns that I love. I use patterns that you can buy online so I ask you to join me in supporting these incredible designers and their livelihood. If you’re interested in sewing along with me, please purchase their patterns. 🙂
This gorgeous duster is a versatile statement piece, and I love this loose and robe-like look. This pattern has dropped shoulders and loose sleeves, and for my next Cambria I’m planning on widening the sleeves so I can layer it over my puffed-sleeve dresses.
Friday Pattern Co. describes the Cambria as a staple fall piece, but I think it’s more versatile, wearable in all seasons depending on the type of fabric that you use. I made mine with a light to medium weight cotton linen blend fabric and it’s perfect for this transitional season.
And one last note, I finished my seams with the Hong Kong Seams and bias bound seams method. I’m not going to sugar-coat it – finishing the seams this way was so time-consuming and exhausting! But the finished look is fantastic and so professional. You are welcome to finish your duster using your preferred method!
Material
Cambria Duster Pattern from Friday Pattern Co.
https://fridaypatterncompany.com/
Or
https://twooninefabric.ca/collections/sewing-patterns
The fabrics I used in the video:
Olivia Linen Cotton Blend in Deep Khaki https://twooninefabric.ca/collections/olivia-collection
The sewing machine I have:
Bernette B37 Swiss Design Computerized Sewing Machine
https://amzn.to/3etYaFE (USA)
LDH Scissors and thread snip
http://bit.ly/3vbHj04
The items I always use for my sewing project
Tailor’s Chalk Pencil
http://bit.ly/chalkpencil
Poly Sewing Thread
https://twooninefabric.ca/collections/sewing-thread
Lightweight Fusible Interfacing
http://bit.ly/fusible_interfacing
Craft Clips
Canada https://amzn.to/32vmK2u
USA https://amzn.to/3sjKKiU
Flat Head Pins
Canada https://amzn.to/2IaKoKm
USA https://amzn.to/32slD31
Point Turner
Canada https://amzn.to/39rgfQA
USA https://amzn.to/3qjfKyA
Wash-away Wonder Tape
Canada https://amzn.to/35DUwUj
USA https://amzn.to/39ylJc2
So, I strongly recommend watching the video if you have things that you couldn’t understand.
These are my online fabric shops.
Dailylike Canada http://www.dailylike.ca
Two O Nine Fabric Studio https://twooninefabric.ca
Let’s get started
Seam Allowance
Use 5/8″ seam allowance unless otherwise stated
Material
Cambria Duster Pattern from Friday Pattern Co.
Optional: Approximately 15 yards of Bias Tape


Recommended Fabric
Light to medium weight woven fabrics with no stretch

Cut
4 Front (Mirrored), 2 Side Front (Mirrored), 1 Back (On Fold), 2 Sleeve, 2 Skirt Front (Mirrored), 1 Skirt Back (On Fold), 2 Tie, 2 Pocket (Mirrored), Bias Tape for Pocket (Optional)

1. Collar
Pin and sew around front Collar RST (Right Side Together)

Trim the seam
Turn right side out and press

*Pressing the seam towards one side first helps create a neat edge
Pin and sew the top edge (Open the seam) RST
Press seam open

Fold right side out and press

2. Pocket
Fold and press the bias tape in half for a guide line
*Optional: Alternatively, you can double fold the curved edge of the Pocket and topstitch

Finish the curved edge with bias tape in your preferred way RST
Fold the bottom edge and press WST (Wrong Side Together)
Bring Skirt Front pieces on the table
Place the Pocket on Skirt Front Matching notches and Pin

Baste the top and sides
*Basting is sewing to hold layers in place temporarily

3. Front Jacket
Pin and sew Side Front and Skirt Front at waist RST
Hong Kong Seams – It’s a method using regular bias tape to wrap around one side of the seam and edgestitch/stitch in the ditch
Press seam open
Line up the bias tape with the seam, pin and sew (3/8″ seam allowance) RST


Fold the bias over and press
Fold the bias around the seam and press again
Edgestitch/Stitch in the ditch
Do the same on the other seam

*On the wrong side of the seam, the bias edge will be raw. You can trim down the bias tape if necessary. Because of the visible raw edge of the bias tape, this method can only be used for open or folded seams
Pin and sew Side Front to Center Front RST
Repeat for the other side
Finish the seam with your preferred method
Press the seam towards the side

4. Back Jacket
Pin and sew Back and Skirt Back at waist RST
Finish the seam with your preferred method
5. Belt
Fold the Tie in half and press RST
Sew and close one end and sew along the length of Tie
Snip the corner
Use any long stick and poke the end
Pull the fabric down and cover the stick

Make sharp corners
Turn right side out
Press
Pin and baste Tie to the raw edge at the waist RST


6. Neckline + Shoulder Seam
Snip the corner of the neckline on the Back piece (less than 1/2″)
*Never try to sew the shoulder seam first. My neckline is messy as I made a mistake and had to unpick the seam, thankfully the method suggested by the pattern worked well!
Match the necklines of Front and Back pieces RST
Sew 5/8″ away from the side edges
Now match the shoulder seams, pin and sew
Sew from where the stitch on the neckline starts

Check the right side if the corners look good
*Bias Bound Seams – It’s a method using double fold bias tape to wrap around the seam and sew all the layers at once. It can be tricky to sew, but it’s the fastest option. Using a bias binding presser foot will help.

7. Sleeve
Pin and sew the Sleeve and the Jacket RST
Finish the seam with your preferred method

Finish the seam with your preferred method
8. Side Seams + Slits
Finish the side seams separately in your preferred method
*If you decide to do Hong Kong seams, start sewing from the right side as the raw edge of the bias tape will be on the wrong side and won’t show
Pin and sew the underarm and side seams up to where the slit starts RST

*I started sewing from the slit end and backstitched several times to secure the slit opening
Press the seam open
Topstitch around the slit

9.Hem
Double fold the sleeve hem to your preferred length and press
Edgestitch/Topstitch
Finish the hem in your preferred method
Fold, press the hem and edgestitch/topstitch

And that’s the Cambria Duster! I hope you enjoyed this tutorial and I would love to hear your thoughts and questions in the comments below. Thanks for reading!
*****Disclosure******
Some of the links above are affiliate links. .Clicking and purchasing through affiliate links gives me a small commission. BUT MORE IMPORTANTLY, I wanted to help you find the materials easier. So you can focus more on your project. Thank you.
*******************
Let’s get connected!
Sewing Therapy
Instagram – https://www.instagram.com/yoursara_k/
Blog – https://sewingtherapy.net/
Twitter – https://twitter.com/SewingTherapy
Dailylike Canada
Instagram – https://www.instagram.com/dailylikecanada
Facebook – http://www.facebook.com/dailylikecanada
Pinterest – https://www.pinterest.ca/dailylikecanada
Two O Nine Fabric Studio
Instagram –https://www.instagram.com/twooninefabric