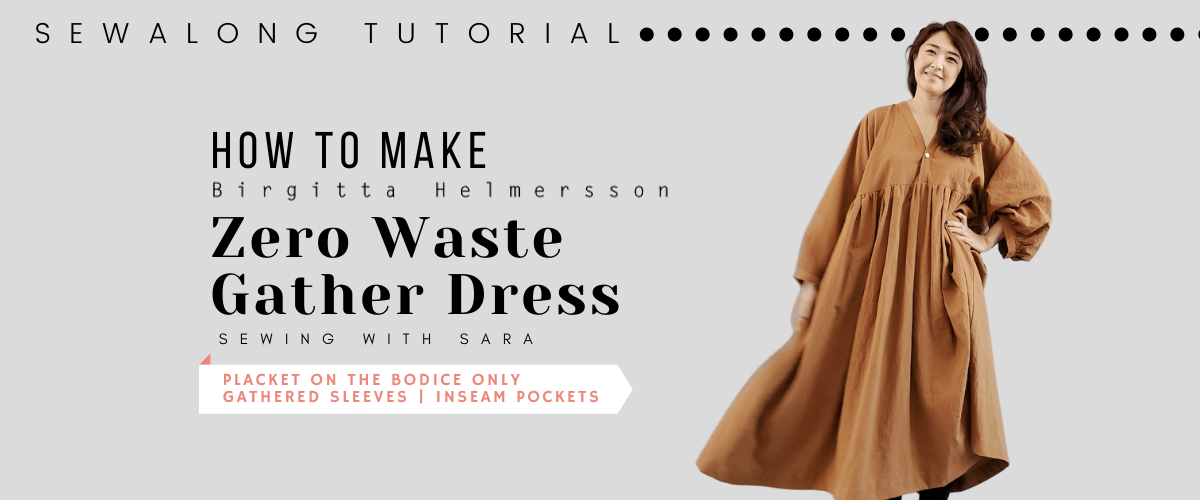
Hello! Sara here. Today’s tutorial is for the Zero Waste Gather Dress! For those who may be new to zero waste design, it’s a method where the goal is to create sewing patterns that do not leave any fabric scraps. None. Nada. Zero waste! The long term goal is to eliminate millions of tonnes of garbage every year as apparel industry professionals say that 15-20% of fabric used to produce clothing winds up in landfills (according to the New York Times).

I hope you’ll join me in this special Sewing Therapy tutorial to explore this zero waste pattern (and hopefully more) that creates a beautiful dress that is wonderful to wear and wonderful for our planet.
Although I always try my best to give you clear and easy to understand instruction, I strongly recommend you watch the video at least once to get the right idea. You can always come back and read the part that you forgot or wasn’t sure of.
Before I go on, I would like to ask you to check out my last tutorial if you are interested in making your own jacket. This Pona Jacket is from Helen’s Closet Pattern and I simply love the jacket!
https://sewingtherapy.net/pona-jacket-sew-along-tutorial/
Now, who’s ready to add this ‘ZERO WASTE Gather Dress’ to their wardrobe? Let’s get started.
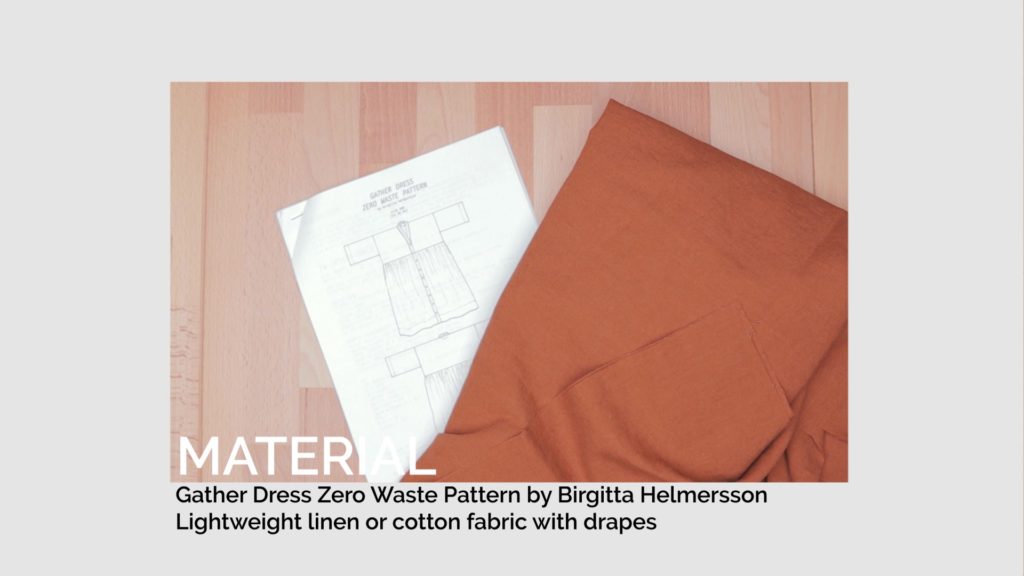
ZW Gather Dress by Birgitta Hemersson (Only PDF available)
http://www.birgittahelmersson.com/shop-patterns/zwgatherdress1
Camel Tan Linen and Cotton blend fabric is from my fabric studio
https://www.etsy.com/ca/shop/TwoONineFabricStudio
LDH Scissors and thread snip https://www.etsy.com/ca/shop/TwoONineFabricStudio
Fray Check Liquid
Canada https://amzn.to/36gMZtZ
USA https://amzn.to/3nboWUp
Craft Clips
Canada https://amzn.to/32vmK2u
USA https://amzn.to/32w91s4
Flat Head Pins
Canada https://amzn.to/2IaKoKm
USA https://amzn.to/32slD31
All the fabrics I used are from my fabric studio
https://www.etsy.com/ca/shop/TwoONineFabricStudio
These are my online fabric shops.
All the fabrics I use are from either Dailylike Canada or Two O Nine Fabric Studio.
Dailylike Canada http://www.dailylike.ca
Two O Nine Fabric Studio https://www.etsy.com/shop/twooninefabricstudio
SEAM ALLOWANCE
Use 1/2″ seam allowance unless otherwise stated
Cut
1 Back Neck Facing, 1 Back Bodice, 2 Front Bodice (Mirrored), 2 Side Seam Facing (Mirrored), 2 Sleeve, 2 Sleeve Band, 2 Skirt, 1 or 2 Neck Band (depends on the version), 2 Pocket
1. Back Neck Facing
Fold 1/4″ of the curved edge of Back Neck Facing and press WST (Wrong Side Together)
Match the notches and edgestitch the folded curved edge

2. Assemble Bodice
Pin and sew the shoulders of Front and Back Bodice RST (Right Side Together)
And serge
Press the shoulder seams towards the back

3. Sleeve
** For this step, we detoured from the instructions
NOT FOLLOWING THE ORIGINAL INSTRUCTIONS
Match and pin the Sleeve and the shoulder seam
Sew and serge
Press the seam towards the Sleeve
Fold Sleeve and pin the underarm and side seams RST

Sew until you meet the stitch, pivot and sew the side seam
Before serging, clip the 90 degree angle

For the Sleeve Gathers, I will cover two methods
1. The Most Common Method: Use Two Parallel Stitches
Using the longest stitch setting, sew 2 parallel lines on the edge
Leave tails of the thread for gathering
Distribute the gathers evenly

Tie off the thread when the sleeve hem reaches the desired width
2. New Found Method Via @SEWBAKEMAKE on Instagram: Use any kind of cord/yarn and a zigzag stitch
Cut any kind of cord/yarn a bit longer than the circumference of the sleeve hem
Using the longest stitch setting, zigzag stitch the cord/yarn to the edge

Zigzag-stitch using the setting
Be careful not to sew on the yarn

Pull the cord/yarn to make gathers
Fold the sleeve band in half and sew the short edge RST
Open the seam
Slip the Sleeve into the Sleeve Band and pin

Turn inside out, spread gathers evenly, and pin
Sew on the side with the gathers
Remove the cord/yarn from the seam
Press the Sleeve Band towards the seam
Fold 1/4″ the Sleeve Band towards the wrong side and fold in half again
Press
Cover the stitch line slightly with the folded edge

And edgestitch/topstitch
4. Neck Band
Match the notches and pin the neckline of Bodice and Neck Band
Wrong Side of Bodice + Right Side of Band
Sew along the neckline
Fold 1/4″ the Neck Band to the wrong side, fold in half again and press

Edgestitch/Topstitch
Make sure the folded edge covers the stitch line slightly
Overlap the Neck Bands, baste and set it aside
5. Pocket
Fold the Pocket in half matching notches RST
Sew and serge the bottom
Match and pin one side of Pocket to the side seam of Skirt
Sew between the notches

Clip into the notches
Press the Pocket towards the seam
Understitch between notches
Send the Pocket over, folding along the seam

Pull out the hidden seams outside of the notches
Line them up and pin
Sew before and after the notches
Pin the side seams of Front Skirt and Back Skirt RST
Sew down the Pocket from the top along the stitch line
Don’t sew the middle layer of the Pocket between the notches

Check with your fingers to make sure you’re not sewing the middle layers between the notches
Sew to the bottom
Serge
6. Skirt
Make gathers on the Skirt using your preferred method
Slip the Bodice into the Skirt RST
Pin the side seams and the centers

Make gathers even and pin
Sew
Remove the yarn
Serge
7. Side Seam Facing + Hem
Fold the diagonal edge in 1/4″ and the top edge down about 2″ WST

Place the Side Seam Facing on the side seam of the Skirt 5″ up from the hem
Right Side of Side Seam Facing + Wrong Side of Skirt
Sew following the main stitch line
Press the Side Seam Facing towards the Skirt Back
And edgestitch/topstitch
Doublefold the hem and press
Cover the Side Seam Facing slightly with the folded hem
And edgestitch/topstitch
8. Button + Buttonhole
**Optional
Every machine has different settings for making buttonholes
So I will skip the instructions

Make a hole using pins and a thread snip
A few drops of Fray Check Liquid will help stop further fraying

Attach the button

Although this may not be your first Zero Waste sewing project, it was mine and like me, I hope you enjoyed the process of creating your own Zero Waste Gather Dress. I loved it so much I have already created two with plans for more. I can’t wait to see yours!
And please sign up to our Sewing Therapy Blog. So you will receive updates on NEW Sew Along Tutorials whenever released!
Thanks for reading! I will see you in the next tutorial!
*****Disclosure******
Some of the links above are affiliate links. .Clicking and purchasing through affiliate links gives me a small commission. BUT MORE IMPORTANTLY, I wanted to help you find the materials easier. So you can focus more on your project. Thank you.
**********************
Here’s my Patreon page link. Your support is greatly appreciated! https://www.patreon.com/user?u=32815284
Let’s get connected!
Sewing Therapy
Instagram – https://www.instagram.com/yoursara_k/
Blog – https://sewingtherapy.net/
Twitter – https://twitter.com/SewingTherapy
Dailylike Canada
Instagram – https://www.instagram.com/dailylikecanada
Facebook – http://www.facebook.com/dailylikecanada
Pinterest – https://www.pinterest.ca/dailylikecanada
Two O Nine Fabric Studio
Instagram –https://www.instagram.com/twooninefabric
Pingback: Cross Back Apron from Tessuti Fabrics - Apron Series No.3 | Sewing Therapy's Sew Along Tutorial - Sewing Therapy