Hello, Sara here. Before I go on, Sewillow is providing us with a great limited-time offer of 20% off on the Yoga Cover Up Pattern! If you are interested! Thank you!
*Limited Time Offer*(20%off)
Use code “SEWINGTHERAPY” to get 20%off Yoga Cover Up Pattern
The code is valid from Jan 19 – Jan 31 2022.
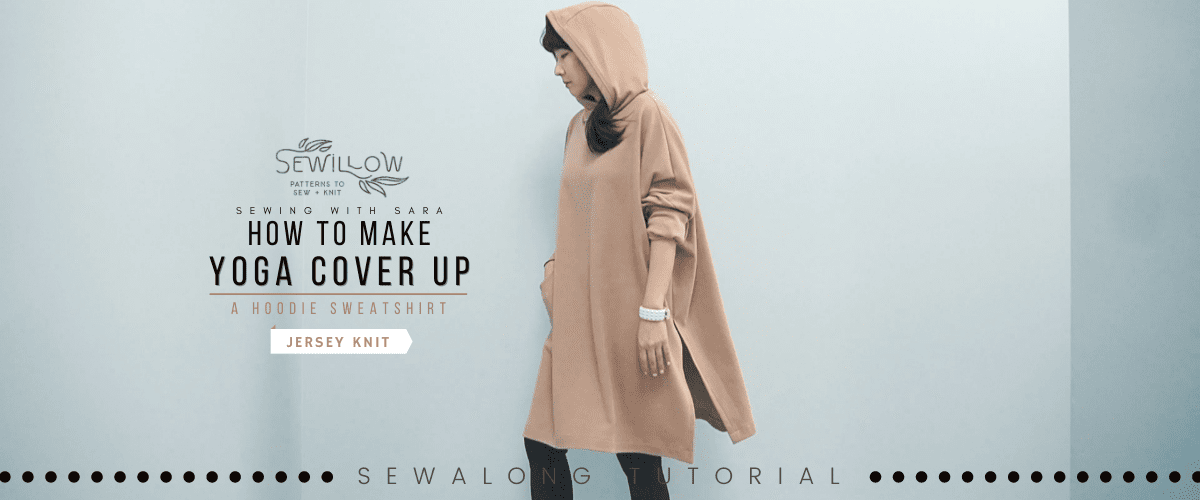
Sewalong with me today and make your own Yoga Cover-Up. This is a pattern by Sewillow and although it’s called a Yoga Coverup, I thought it would make a great hoodie-style sweatshirt. There are so many great sweatshirt patterns available online, but what attracted me to this one was the cute V-neck details on the front and the dramatic oversized bodice. I ended up making a hoodie sweater dress and two hoodie sweatshirts (a longer version and a cropped version) for myself, and one hoodie sweatshirt for my hubby. I’ll share the details of each make at the end of the video.
Before we get started, a few reminders: if you like this video and want to see more like it, please give it a like, subscribe, and ring the little bell for notifications. Of course, don’t forget to subscribe here, my blog! I have lots of great patterns planned for my 2022 makes and I’d love for you to sewalong with me! I filmed the setting of my machine to show you and possibly help you get over any fears about sewing with knits.
Hanri of Sewillow Patterns has generously offered a discount on this pattern for you! It’s a limited-time offer, so if you’re planning on sewing this cute hoodie with me, check the details in the description below and don’t delay in buying one!
If you changed your old needle to a new ballpoint/knit needle on your machine, you’re all set! Let’s get started.
As always, I strongly recommend you watch the video, especially when you get stuck. 🙂
Seam Allowance
Use 1/2″ seam allowance unless otherwise stated

Material
Yoga Cover Up Pattern from Sewillow Patterns
Yoga Cover Up PDF pattern from Sewillow Patterns
https://www.etsy.com/ca/shop/Sewillow
I used Jersey Knit fabric and matching ribbing from my shop
https://twooninefabric.ca/collections/palette-jersey-knit-matching-ribbing
FAQ Material List
The sewing machine I have:
Bernette B37 Swiss Design Computerized Sewing Machine
https://amzn.to/3etYaFE (USA)
LDH Scissors and thread snip
http://bit.ly/3vbHj04
Tailor’s Chalk Pencil
http://bit.ly/chalkpencil
Poly Sewing Thread
https://bit.ly/209thread
Lightweight Fusible Interfacing
https://bit.ly/3GETKGw
Wash-away Wonder Tape
Canada https://amzn.to/35DUwUj
USA https://amzn.to/39ylJc2
Craft Clips
Canada https://amzn.to/32vmK2u
USA https://amzn.to/3sjKKiU
Flat Head Pins
Canada https://amzn.to/2IaKoKm
USA https://amzn.to/32slD31
Point Turner
Canada https://amzn.to/39rgfQA
USA https://amzn.to/3qjfKyA
Here’s my Patreon page link. Your support is greatly appreciated!
https://www.patreon.com/user?u=32815284


Add 1/2″ seam allowance
in case you’re using the Papersaver Pattern
Cut
1 Front Bodice (On Fold), 1 Back Bodice (On Fold), 2 Sleeve (Mirrored), 2 Hood (Mirrored), 1 Center Hood Panel, 2 Pocket (Mirrored), Piping Strips


1. Hood
Pin and sew Hood and Center Hood Panel at the outer curved edge RST (Right Side Together)
Sew and serge
Pin and sew Hood and Center Hood Panel on the other side RST
Sew and serge
Fold the Piping fabric in half

Pin and sew the Piping to the front edge of the Hood RST
Serge
Send the seam towards the Hood and topstitch/understitch
*I move the needle position when I need a nice looking topstitch

Cross over the front neck parts of the Hood Piece and match the pointed edges
Baste *Basting is a straight stitch used to temporarily hold layers of fabric together
2. Bodice + Sleeve
Pin and sew the Front Bodice and Back Bodice at the shoulder RST
Sew and serge
Pin the Sleeves to the Bodice RST
Sew and serge the Sleeve areas only

Pin and sew the underarm seam and side seam up to where the slit starts
3. Side Slit

Serge one side of the slit first
Serge the rest
Fold the seam of the Slits and press WST (Wrong Side Together)
Topstitch
4. Hood + Bodice
Mark the sewing point under the V
Mark the center of Hood and Bodice
Slip the Hood into the Bodice RST
Match the marks on the V area
Pin and sew half of the Hood and Boice neckline

Match the other side of the neckline, pin and sew
*Snipping the sharp point of the V will help match the seams on the other side
Sew and serge
Optional: Turn the hoodie right side out and topstitch/understitch the neckline
5. Pocket
Using the same method as on the Hood, add piping to the curved edges of the Pockets
Fold the outer seam of the Pocket and press

Pin/Wonder tape the Pocket to the preferred location on the Bodice
Topstitch/edgestitch
6. (Optional) Cuff Band
Fold the Cuff Band (9″ x 7″) in half and sew RST
Open the seam and fold in half WST
Slip the Sleeve into the Cuff Band and match the seam
Stretch the Cuff Band as you sew and focus on matching the edges

Finish and sew the hem using your preferred way


That brings us to the end of sewing a Yoga Cover Up by Sewillow Patterns. Thanks again to Hanri for generously providing a discount code for this Sewing Therapy community and for creating an amazing pattern. I’d love to hear all about your experience making a Yoga Cover Up! Thanks for reading! I will see you next time!
*****Disclosure******
Some of the links above are affiliate links. Clicking and purchasing through affiliate links gives me a small commission. BUT MORE IMPORTANTLY, I wanted to help you find the materials easier. So you can focus more on your project. Thank you.
**********************
Let’s get connected!
Sewing Therapy
Instagram – https://www.instagram.com/yoursara_k/
YouTube – http://youtube.com/c/sewingtherapy
Tiktok – http://tiktok.com/@yoursara_k
Dailylike Canada
Instagram – https://www.instagram.com/dailylikecanada
Two O Nine Fabric Studio Instagram
https://www.instagram.com/twooninefabric.ca
